White River Hardwoods · Tracery Panels · Made in the USA
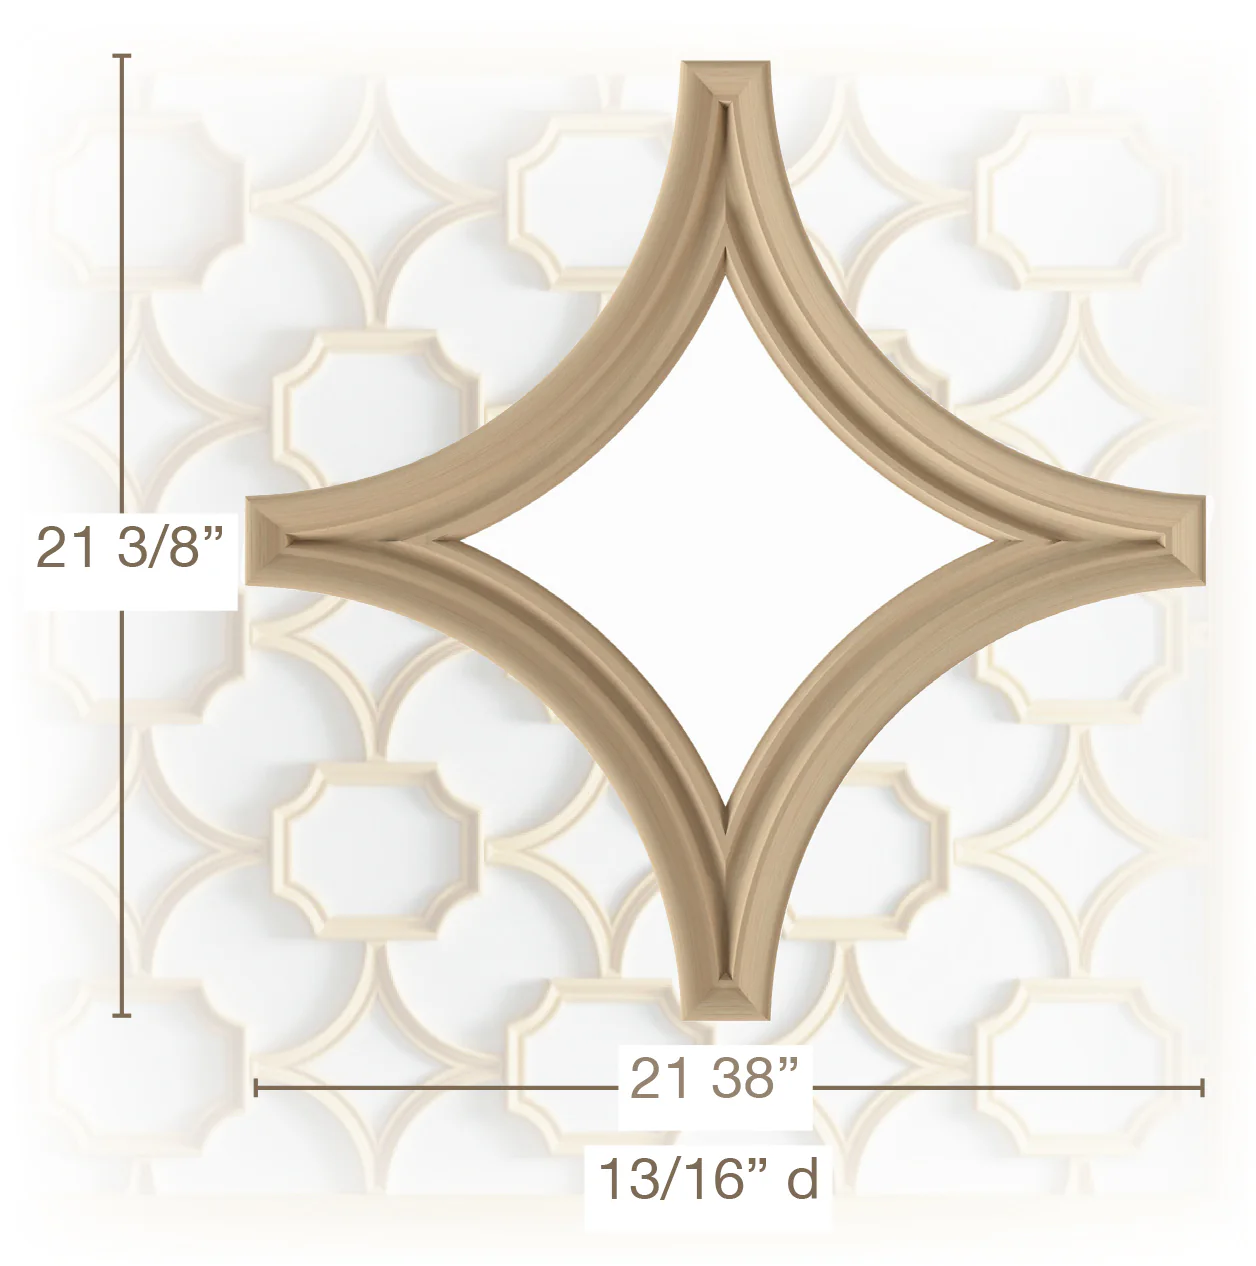
Diamond Tracery Panel
SKU CLGPAN221 · Sold in Pairs · Cast Resin
21 3/8″ Square · 13/16″ Depth · Unfinished
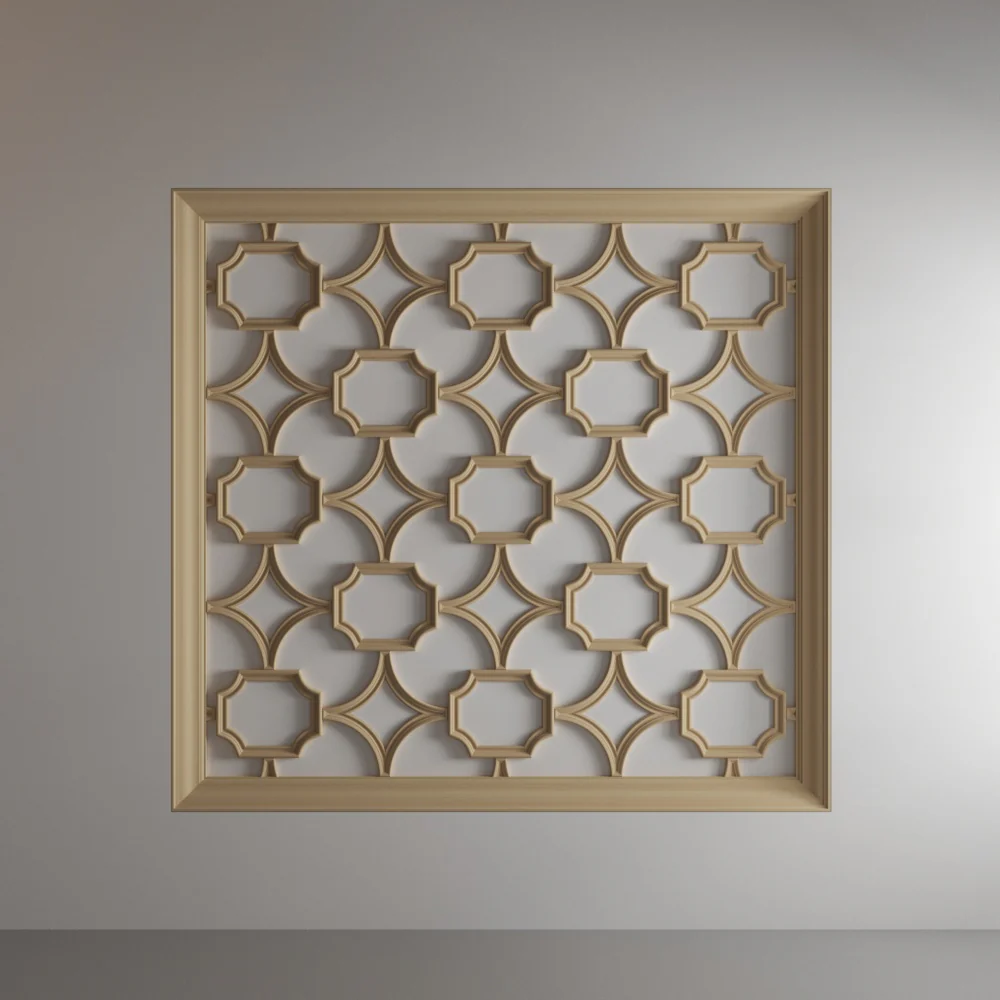
The centerpiece of a classically inspired tracery ceiling system. A square resin panel with refined geometric relief — precision-cast to align seamlessly with the Coved Corner panel and Ceiling Tips across a full ceiling field.
The Diamond panel is what the eye sees first — a square of architectural relief that scales beautifully across large ceiling fields.
Product Details
Dimensions & Specifications
| SKU |
Profile |
Width |
Height |
Depth |
Material |
Sold As |
| CLGPAN221 |
Diamond |
21 3/8″ |
21 3/8″ |
13/16″ Depth |
Cast Resin |
1 Pair |
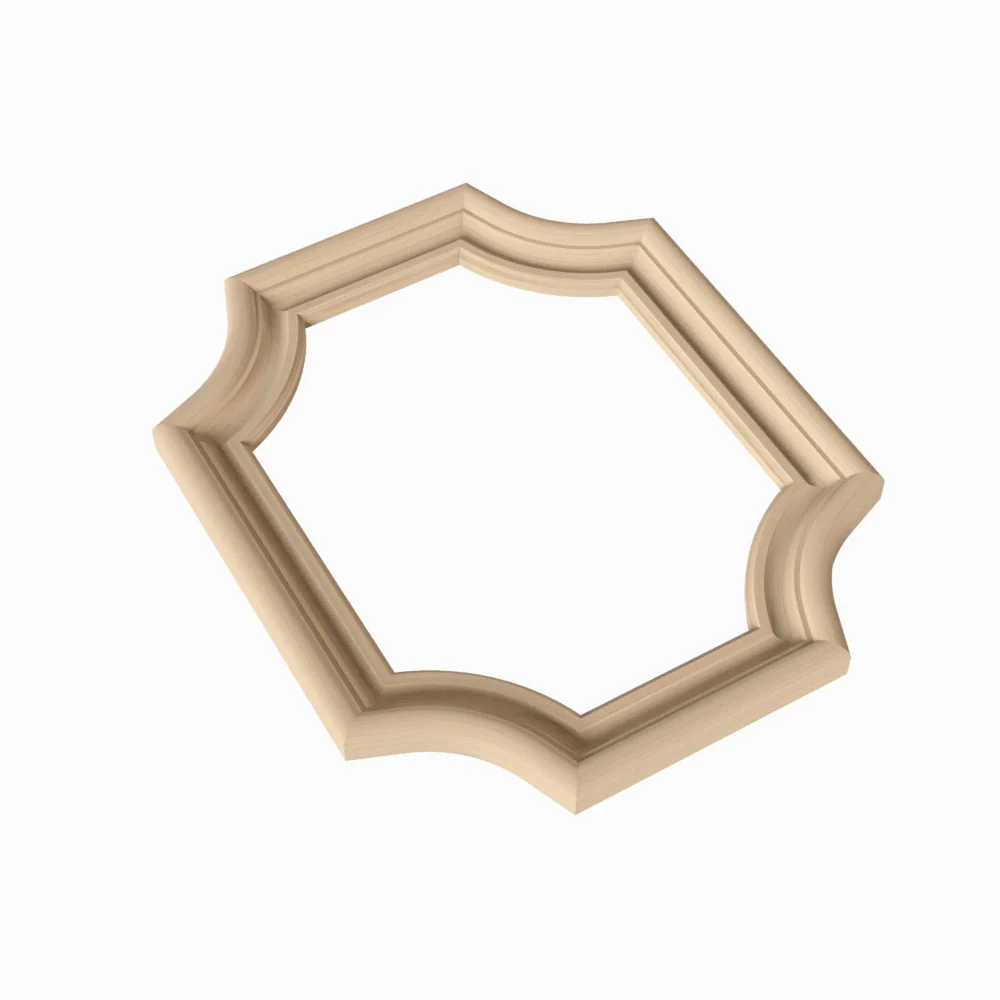
* Unfinished — ready to paint, gild, or finish. Pairs with CLGPAN218 and CLGPAN221-TIP to complete the tracery ceiling system.
Why Tracery Panels
Classical Ceiling Detail, Simplified
◇
The Field Panel
The Diamond panel fills the main field of a tracery ceiling. At 21 3/8″ square, it creates a substantial visual presence — enough relief to read clearly from below, in proportion with typical ceiling heights in residential and commercial interiors.
▣
Cast Resin Construction
Precision-cast from durable resin for consistent depth and crisp relief. Lightweight for overhead installation — the full panel weight is manageable for a single installer with proper support while adhesive sets.
★
Sold in Pairs
Sold as a pair so adjacent field panels are always matched from the same casting run. Consistent depth and surface detail across the full ceiling — critical when panels are viewed side by side under raking light.
⊞
Ready to Finish
Supplied unfinished — paint to match the ceiling, apply gold leaf for a formal look, or finish to contrast for a more graphic effect. Resin accepts most paint and finish systems. Test on an off-cut before full application.
Installation
Installing Tracery Panels
1
Plan Your Layout
Map the full ceiling pattern before installing. Find the center of the bay and work outward. For the standard layout: 8 × CLGPAN221 + 7 × CLGPAN218 + 6 × CLGPAN221-TIP.
2
Dry Fit First
Dry fit the entire layout before applying adhesive. Confirm spacing, check alignment, and verify the pattern reads correctly from standing height before committing.
3
Apply Adhesive
Use a construction adhesive rated for resin. Apply to the back face of each panel. Position carefully — adhesion sets quickly and repositioning after contact is difficult on a ceiling.
4
Secure Temporarily
Use temporary supports or finishing nails to hold panels in place while adhesive cures fully. Remove supports once set. Fill nail holes before finishing.
5
Fill & Finish
Caulk seams between panels and at ceiling perimeter. Fill fastener holes. Apply finish once all panels are set and seams are clean and dry.
6
Install Tips Last
Tracery Ceiling Tips (CLGPAN221-TIP) install after all field and corner panels are set. Tips complete the intersections — install them last for the cleanest result.
Complete the System
The Diamond Tracery Panel works as part of a three-piece ceiling system. Standard layout formula: 8 × CLGPAN221 + 7 × CLGPAN218 + 6 × CLGPAN221-TIP. Order all three pieces together to ensure consistent material from the same production run.
Shipping
Tracery panels ship via standard carrier. Lead time is approximately 7–10 business days from order confirmation, subject to availability. Contact our sales team at 1-800-558-0119 for freight quotes on larger orders.
CLGPAN221 — Diamond Tracery Panel, 21 3/8″ Square. Sold in pairs.